Showing posts with label bead. Show all posts
Monday, September 26, 2011
Tuesday, June 15, 2010
Ottawa Glass Bead Artists
Last week I contacted the Ottawa Glass Bead Artists to see about getting involved in upcoming events. I got an immediate reply from Grace Edwards of Laucha Lady fame. Apparently she has just opened a new teaching studio on Colonnade (near my old high school!) which hosts special events, meetings and demonstrations!

Sounds very interesting. I look forward to attending an event in the near future!

Sounds very interesting. I look forward to attending an event in the near future!
Wednesday, May 5, 2010
The New Floral Stamen
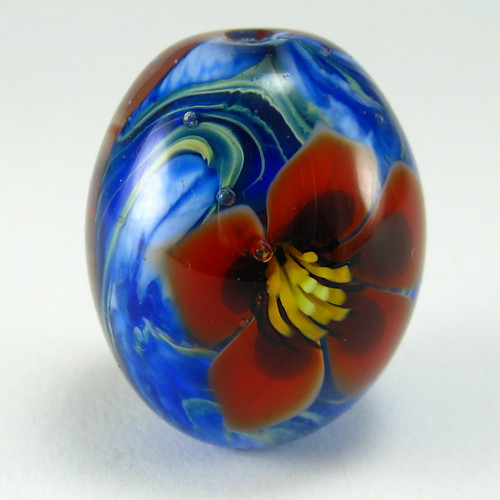
So I finally got to use my new floral stamen stringer in a new bead. Here is the result! I get a sprightly, vaguely Eastern European feeling from this one. :) It will be unveiled at our final Winnipeg show this weekend.
This look is so different from my past ones. Definitely the most successful petaled stamen I've ever made, but it's so vivid that I'm it sure whether it would work with less flame-coloured flowers! I think it might work best as a separate mini-flower cane on its own. What do you think?
Thursday, April 15, 2010
Florals with New Stamen Cane
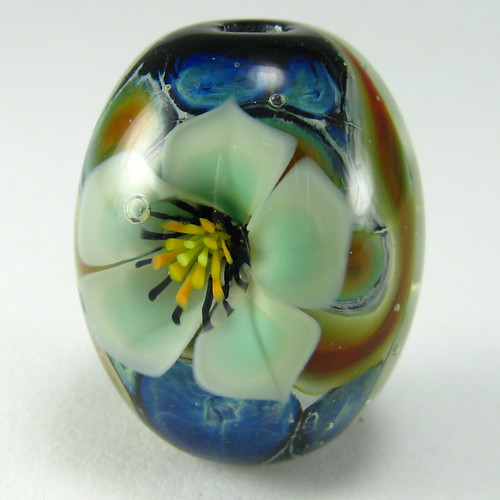
As promised in my last post, here are the latest photos of my recent batch of floral beads! They all feature the newer 27-element stamen that I made a few weeks ago.
Landini Lily
The fattest of the batch! Named after a deep red Asiatic lily, this one has some pleasant swirliness to it and a fabulous background with my handmade reactive blue cane.

Green Dragon Amaryllis
This is the smallest of the batch - cute yet intense. I really like the colour combination using reactive cane, rubino and silver. Stay tuned for a bigger version in this same colour scheme because I love it so.

Asterid
This one is the tallest and most tapered of the batch. The background was made with red and orange enamel that turned yellow. It was unexpected but the result reminds me of veins of quartz granite and gold in a prospector's mine!

I actually made an even newer stamen cane on Monday with a super-miniaturized black inner layer, yellow, orange and dark green mid-layers and outer layer of pink petals. I haven't tested it in a bead and I'm super-curious to see how it'll look. Stay tuned for the results, PLUS some info on how I make my stamen canes!
Landini Lily
The fattest of the batch! Named after a deep red Asiatic lily, this one has some pleasant swirliness to it and a fabulous background with my handmade reactive blue cane.
Green Dragon Amaryllis
This is the smallest of the batch - cute yet intense. I really like the colour combination using reactive cane, rubino and silver. Stay tuned for a bigger version in this same colour scheme because I love it so.
Asterid
This one is the tallest and most tapered of the batch. The background was made with red and orange enamel that turned yellow. It was unexpected but the result reminds me of veins of quartz granite and gold in a prospector's mine!
I actually made an even newer stamen cane on Monday with a super-miniaturized black inner layer, yellow, orange and dark green mid-layers and outer layer of pink petals. I haven't tested it in a bead and I'm super-curious to see how it'll look. Stay tuned for the results, PLUS some info on how I make my stamen canes!
Wednesday, December 16, 2009
What a Rush!
Phew - the show season is over, and we did a good job, I think! Part of me would have liked to have done more and more (more dragonflies! more forged earrings! more metalsmithed work!) but the more reasonable part of me is glad that we limited it to four shows this year. They were really *good* shows for us, and left us some time to deal with our non-glass world as well! And it left both myself and (hopefully) our customers "wanting more" for the future...
Now it's time for us to focus on our Christmas. We still don't have very clear plans yet but our tree is up and sparkly, and that feels like a very good start!
I'll leave you with a photo of my latest floral (still available, by the way) to tide you over until I post again. :) Merry Christmas! Happy Solstice! It is coming soon and I can't wait for the days to get longer!
Now it's time for us to focus on our Christmas. We still don't have very clear plans yet but our tree is up and sparkly, and that feels like a very good start!
I'll leave you with a photo of my latest floral (still available, by the way) to tide you over until I post again. :) Merry Christmas! Happy Solstice! It is coming soon and I can't wait for the days to get longer!
Wednesday, December 2, 2009
New Purple Floral Bead
As promised, here`s a shot of my latest encased floral! I`m using a new technoque to apply the stamen now: pre-nipping-off a point-pulled stamen section, and attaching it to a clear rod. Then I can just plunge it in as deep as I want, and melt off the clear rod leaving an automatic "expansion dot" of clear on top.
Before this, I was plunging a point attached to the full stamen rod, then cooling that and nipping it off the bead itself. This worked fine when the stamen rod was skinny, but now that I'm working in a thicker section it was giving me more trouble. I was either breaking the stamen off too stubby in the plunge-dent, or breaking the whole darn bead off the bead release. The new approach is much less disaster-prone!

Front shot, showing the stamen cane. I like how the stamen went a bit spirally this time! Finally, distortion working in my favour! >:)
.JPG)
Side shot of the floral showing the reactive base. I love how the reactive cane recipe turned out! It`s a bit less yellow and more blue in real life.
My Mom should be landing in Winnipeg for a visit right about... now! She's here for work and knows we're working too getting ready for the Velocity show on Niagara this weekend. She`s agreed to help us come up with names for our work (such as this bead - suggestions, anyone?), and maybe do a little tagging duty too! What a trooper! :)
Before this, I was plunging a point attached to the full stamen rod, then cooling that and nipping it off the bead itself. This worked fine when the stamen rod was skinny, but now that I'm working in a thicker section it was giving me more trouble. I was either breaking the stamen off too stubby in the plunge-dent, or breaking the whole darn bead off the bead release. The new approach is much less disaster-prone!
Front shot, showing the stamen cane. I like how the stamen went a bit spirally this time! Finally, distortion working in my favour! >:)
Side shot of the floral showing the reactive base. I love how the reactive cane recipe turned out! It`s a bit less yellow and more blue in real life.
My Mom should be landing in Winnipeg for a visit right about... now! She's here for work and knows we're working too getting ready for the Velocity show on Niagara this weekend. She`s agreed to help us come up with names for our work (such as this bead - suggestions, anyone?), and maybe do a little tagging duty too! What a trooper! :)
Monday, November 30, 2009
Studio Shows for the Next Two Weekends!

Andrea and I are getting ready for our Velocity Studio show this weekend! After the bustle and bright lights of the huge Signatures show a week-and-a-half ago, we're looking forward to capping the season with laid-back, cozy studio shows. It was exciting to meet so many new people at Signatures, though! I really came out of my shell and felt like I was "in the zone" with greeting and answering questions. Sometimes I can be so shy at shows! Luckily Andrea is so outgoing.
Speaking of reaching new people, I was on the radio this morning! CKUW's "People of Interest" show at 8:20am. I went on a bit of a ramble about Coefficiency of Expansion and different glass families that probably bored people, and I forgot to bring up our recycled leather bracelets when asked about recycled elements, but overall I think I got the message across about the durability and soulfulness of artisan-made flameworked beads. And of course I mentioned the studio shows! Since they are held in private studios/homes word of mouth is crucial.
So I hope to see you this weekend or next! We'll have lots of new leather cuffs (we almost sold out at Signatures!) forged earrings and dragonflies.
Monday, March 30, 2009
New Florals!
I spent some time photographing my new work yesterday and wanted to share some glam shots of my latest florals!

This was my first floral test of the new "Effetre Ultra Clear", Peace White and Bordello Red. The flower is *okay* but I wasn't thrilled with any of the new colours. Ultra clear is not really ultra anything, just regular. Lots of visible bubbles in the rods itself, and you do have to work it quite cold. Manageable, but not amazing. Still, the next step up is way too expensive for me, so I'll just work far back in the flame and I'll be fine. :)
Peace White actually looked a lot less opaque than my old white in rod form and didn't seem to resist translucency any better. Bordello looks okay in this photo but in real life it's actually a lot darker and duller. Layering it over yellow was a mistake, since it's more of a purple red! A little goes a long way. The "starry" silver background was also unexpected. I thought I was using silver leaf but it was actually silver foil that I'd managed to slip into a leaf envelope. Insanity!
This was my second go with Bordello, matched with Effetre Ink Blue. Again, it's darker and browner in read life. Still, it was a pretty bead with my reactive cane background!
...So much so that I made an almost identical bead my second time at the torch. Without really planning to! This one has regular red, Effetre Amethyst centre petals and Leaky Pen accent flowers. I *am* thrilled with Leaky Pen!
Here you can see how close they look. Even the same size! Weird.
This one is very cute and tiny and pretty close to perfect! Ink blue on Leaky Pen with a lapis and cane background. It's one of the smaller florals I've made! Not sure why I went so small. I guess it'll make it more wearable, at least.

And here's a family portrait to show the different sizes and shapes. I haven't measured them yet but the biggest one is around 30mm, the middle one around 25, and the smallest just 20ish. Yay, I'm making florals again!
Now I just need to think of names! Any suggestions?!
This was my first floral test of the new "Effetre Ultra Clear", Peace White and Bordello Red. The flower is *okay* but I wasn't thrilled with any of the new colours. Ultra clear is not really ultra anything, just regular. Lots of visible bubbles in the rods itself, and you do have to work it quite cold. Manageable, but not amazing. Still, the next step up is way too expensive for me, so I'll just work far back in the flame and I'll be fine. :)
Peace White actually looked a lot less opaque than my old white in rod form and didn't seem to resist translucency any better. Bordello looks okay in this photo but in real life it's actually a lot darker and duller. Layering it over yellow was a mistake, since it's more of a purple red! A little goes a long way. The "starry" silver background was also unexpected. I thought I was using silver leaf but it was actually silver foil that I'd managed to slip into a leaf envelope. Insanity!
This one is very cute and tiny and pretty close to perfect! Ink blue on Leaky Pen with a lapis and cane background. It's one of the smaller florals I've made! Not sure why I went so small. I guess it'll make it more wearable, at least. And here's a family portrait to show the different sizes and shapes. I haven't measured them yet but the biggest one is around 30mm, the middle one around 25, and the smallest just 20ish. Yay, I'm making florals again!
Now I just need to think of names! Any suggestions?!
Friday, February 27, 2009
New Nerodita pendant on Etsy
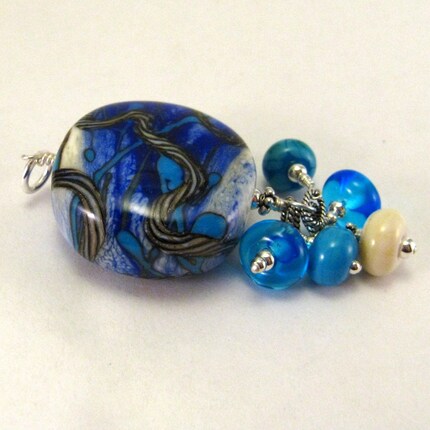
I've just posted a new pendant in our Etsy store. It's a lovely, substantial organic disc with 5 ornate dangles.
I really like the look of the silvered ivory twisty cane meandering over the surface, with lots of richness and reactions.
Subscribe to:
Posts (Atom)