I spent some time photographing my new work yesterday and wanted to share some glam shots of my latest florals!

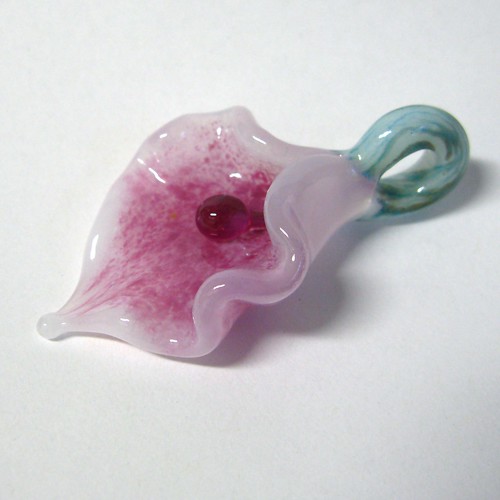
This was my first floral test of the new "Effetre Ultra Clear", Peace White and Bordello Red. The flower is *okay* but I wasn't thrilled with any of the new colours. Ultra clear is not really ultra anything, just regular. Lots of visible bubbles in the rods itself, and you do have to work it quite cold. Manageable, but not amazing. Still, the next step up is way too expensive for me, so I'll just work far back in the flame and I'll be fine. :)
Peace White actually looked a lot less opaque than my old white in rod form and didn't seem to resist translucency any better. Bordello looks okay in this photo but in real life it's actually a lot darker and duller. Layering it over yellow was a mistake, since it's more of a purple red! A little goes a long way. The "starry" silver background was also unexpected. I thought I was using silver leaf but it was actually silver foil that I'd managed to slip into a leaf envelope. Insanity!

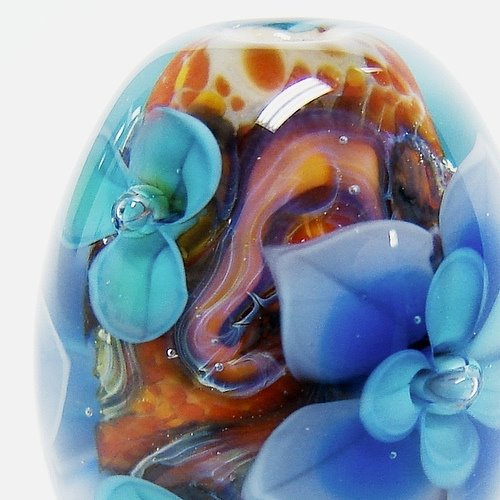
This was my second go with Bordello, matched with Effetre Ink Blue. Again, it's darker and browner in read life. Still, it was a pretty bead with my reactive cane background!

...So much so that I made an almost identical bead my second time at the torch. Without really planning to! This one has regular red, Effetre Amethyst centre petals and Leaky Pen accent flowers. I *am* thrilled with Leaky Pen!

Here you can see how close they look. Even the same size! Weird.

This one is very cute and tiny and pretty close to perfect! Ink blue on Leaky Pen with a lapis and cane background. It's one of the smaller florals I've made! Not sure why I went so small. I guess it'll make it more wearable, at least.

And here's a family portrait to show the different sizes and shapes. I haven't measured them yet but the biggest one is around 30mm, the middle one around 25, and the smallest just 20ish. Yay, I'm making florals again!
Now I just need to think of names! Any suggestions?!


 This is an outdoor festival held in a Central Park in the Glebe, a sophisticated and funky neighbourhood in central Ottawa. It features a blend of fine visual art and handcrafted artisanry in media such as jewellery, glass, ceramics, wood, metal, textiles and more! Check out the artist directory from 2010 to see what I mean.
  We're very excited to participate and have a million ideas. More updates coming soon!
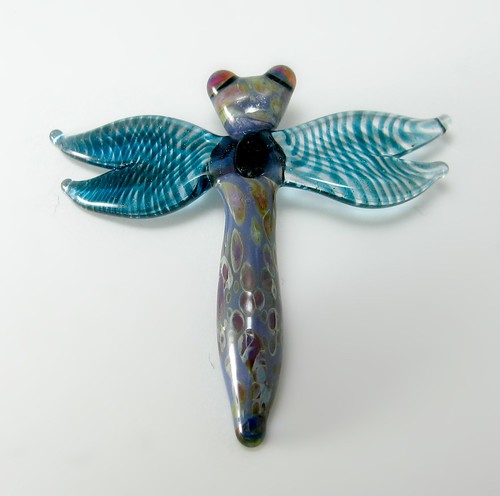
 This look is so different from my past ones. Definitely the most successful petaled stamen I've ever made, but it's so vivid that I'm it sure whether it would work with less flame-coloured flowers! I think it might work best as a separate mini-flower cane on its own. What do you think?


.JPG)

 Elm Street Artisan Open House - the Spring edition
 This was my second go with Bordello, matched with Effetre Ink Blue. Again, it's darker and browner in read life. Still, it was a pretty bead with my reactive cane background!
 ...So much so that I made an almost identical bead my second time at the torch. Without really planning to! This one has regular red, Effetre Amethyst centre petals and Leaky Pen accent flowers. I *am* thrilled with Leaky Pen!
  Here you can see how close they look. Even the same size! Weird.
 This one is very cute and tiny and pretty close to perfect! Ink blue on Leaky Pen with a lapis and cane background. It's one of the smaller florals I've made! Not sure why I went so small. I guess it'll make it more wearable, at least.